If you’re a serious angler then you know how valuable a fish finder is for helping you get the most out of your fishing trip. A lot of the pontoons on the market come with the option of having a fish finder and GPS installed. This way, you don’t have to worry about learning how to install a fish finder on a pontoon boat.
What about the people who either don’t have the option of adding a fish finder or choose to install one at a later day? Fortunately, putting a fish finder in your pontoon isn’t rocket science. It just takes time and basic electrical knowledge.
How to Install a Fish Finder on a Pontoon Boat
With a little bit of help and some knowledge of your boat, you’ll be able to install a fish finder in 45 minutes to a couple of hours.
Let’s get started
The first thing you’re going to need to do before you get started is to choose a fish finder for your boat. There are a number of different fish finders available on the market, so finding one that suits your specific needs shouldn’t be hard at all.
Two of the more popular models that a lot of pontoon boat enthusiasts like to use are the Garmin Striker 7SV and the Humminbird ICE HELIX 5 Sonar GPS and Fish Finder. Both of these fish finders come with the transducer and are for use once they’ve been installed.
For more great options check out our top 3 here:
Best fish finder for pontoons buyers' guide
You’ll need these materials
Before you start installing your fish finder, create a checklist of materials that you’ll need to get you through the job. Most installations will require the following items:
- Power drill and 1/4" (0.6mm) drill bit.
- Screwdriver, probably a Philips-head but take a flathead also just in case.
- Six stainless steel nuts and1/4" (0.6mm) bolts. Make sure that each bolt is 1.25" (3cm) long.
- Six rubber washer and six metal washers.
- Approximately 20' of electrical shroud/plastic conduit.
- Silicon sealant.
- Terminal connectors.
If you already have screwdrivers, a drill, and wire strippers handy, then you’ll be happy to know that the rest of the project material is relatively cheap. Additionally, installing your very own fish finder could save you more than $100, which would’ve been spent paying for a professional installation.
Where do you mount a fish finder on a pontoon boat?
The answer to this question depends on what part of the fish finder you’re talking about, as two components get mounted to the boat: the monitor and the transducer.
Choosing your monitor placement
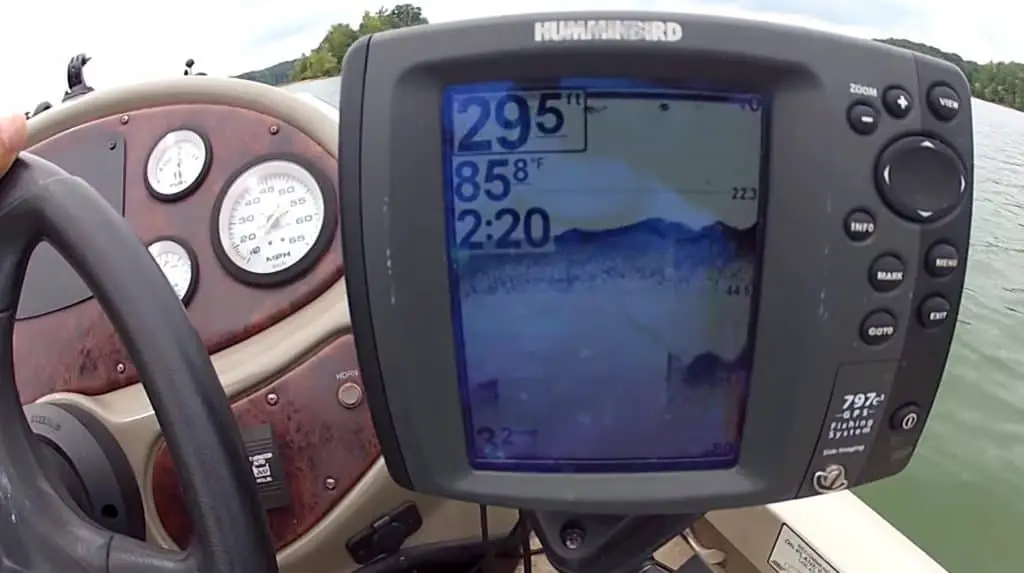
The monitor is your display. It typically comes as an LCD screen, and some of the more advanced versions are touchscreen and high-tech. Since the fish finder monitor serves as your eyes underwater, you’re going to want to put it in a convenient place that’s easy to access. With that in mind, it would only make sense to have your monitor mounted at the helm, right? That will allow you to monitor all of your instruments, as well as your fish finder, at the same time.
Unfortunately, it’s not always that easy. While there are many pontoons out there that come with ample pontoon space for owners who want to pick up a fish finder later, there are some that don’t. Every boat is different, and finding that right spot can be a challenge in itself. Here are some things to consider when finding a place to mount your monitor:
- Do some investigating beforehand. Contact your pontoon dealer and ask where they recommend mounting a fish finder.
- Have a look at all the potential places to mount the monitor at your helm. Measure these spaces and make sure you buy a monitor that fits.
- Opt for a smaller fish finder monitor if you have to.
- When you do find a place to mount your monitor, make sure that drilling and screwing the mount in won’t affect your gauges and wires.
Mounting transducer to pontoon
The transducer is the most important part of the fish finder. If the monitor is your underwater set of eyes, consider the transducer the brains that make it all happen. Think of it as a sensor that detects what’s under your boat. Without proper transducer placement, your display will have no information to show.
Step 1: Start with the transducer placement
Fortunately for pontoon owners, installing the transducer is a quick and easy process. Unlike mounting your monitor, finding a spot for the pontoon boat transducer mounting bracket is relatively painless. This is because pretty much all pontoon boat owners put their transducer in the same place:
On the bottom of a bracket located on the back of a pontoon tube.
And the best spot for the transducer is...
Under the pontoon.
However, you need to take into consideration the length of your wires. You want to make sure that you have enough cord to run from the transducer up to the monitor. Prevent yourself from any cord-related problems by installing your transducer on the same side of the boat as your monitor.
For example, most pontoons have the captain’s chair located starboard, or on the right side of the boat. In optimal situations, the monitor to your fish finder should be mounted near the captain’s chair, which would mean that your transducer should go under the right pontoon.
Alternatively, you can also purchase extension cables if you still don’t have enough cord to work with. Even so, you still want the transducer on the same side as your monitor to reduce the risk of electrical interferences or having a weak signal.
Step 2: Mount your transducer
Measure and drill two holes with a ¼” drill bit onto bottom bracket of your pontoon tube. Be very careful not to puncture the tube. Once you’ve done this, attach the transducer mount with washer, nut, and bolt. This is probably the easiest part of the process.
Step 3: Setting up the wires
Now for the hard part: fishing the wires from the transducer to the helm, assuming you’re installing the fish finder at the console where it belongs.
- Start by sliding the fish finder’s transducer cord into an electrical conduit. This will help keep it protected over the years.
- Unscrew and remove the siding from your pontoon boat. Have a friend hold the other end of the siding as you remove it, so that it won’t fall and get damaged.
- You’ll see other wires running along the edge of the boat. Fish your transducer cord along the same path.
- Fish the wires all the way up to the underside of your console’s instrument panel. This is where you’ll see various bolts, connection points, and circular objects (the back of your gauges)
Step 4: Install the monitor
Here’s where things start to get serious. Hopefully, you’ve decided where on the console you want to mount your monitor, because you need to drill there and fish your wire through.
- Take the monitor’s bracket and place it at your preferred location.
- Using the bracket as your guide, use a pencil or marker to mark the bracket’s holes onto your console.
- Very carefully drill holes in these spots. Don’t try to go too fast or force the drill, otherwise you’ll break the fiberglass. One strategy is to start with smaller bits and re-drill with bigger bits, gradually working your way up to the ¼” drill bit.
- Use your nuts, bolts, and washers to attach the bracket to the console.
- Put silicone over the holes for extra protection.
- Drill one last hole behind your bracket for the transducer cord.
Step 5: More electrical work
You now need to give your fish finder a proper power source. While working with wires can seem intimidating if you don’t have an electrical background, it’s not as hard as you may think.
You have two ways to power your fish finder: through the fuse box or through the battery. I’ll provide you with steps for both.
Using the fuse box
- Attach terminal connector plugs to the end of your wires.
- Look under your console at the electrical work and find a vacant plug that will find your terminal plug.
- Tie your plug into an empty connection.
If you don’t have an empty connection available, you can either find an electrician that can help you, or you can go directly to the battery.
Using the battery
This is best for people without empty slots in their fuse box. It will require you to have an extra 20’ electrical cable on hand.
- Fish the wires from the console to the back of the boat, just like you did with the transducer cable.
- Tie the wires from the cord onto the battery. Remember: black goes on negative and red goes on positive.
The benefit of going to the battery is that you’re following the path you’ve already cleared for the transducer, which means that you already have some experience doing it. Unless you’re certain that you have empty slots in your fuse box, I’d recommend taking the battery approach.
Step 6: Assemble your boat
Take a moment to pat yourself on the back, because all of the hard work is done. If there are any connections that need to be made with your monitor, like fastening it to the bracket or plugging in the transducer table, do them now. After you’ve finished that, all you have left to do is put your boat back together and you’re done.
Congratulations. You’ve just learned how to install a fish finder on a pontoon boat! Now go out and catch some fish!


Do you have any pics to show where to mount the transducer?